Mounting a Solitaire Ring
While visiting my family in California, I picked up a pile of mail we accumulated while traveling the past year. In it, I found treasures —…
While visiting my family in California, I picked up a pile of mail we accumulated while traveling the past year. In it, I found treasures — literally! Inside one of the packages was a 14K gold ring mounting I had bought last year right before I took off for Chile.
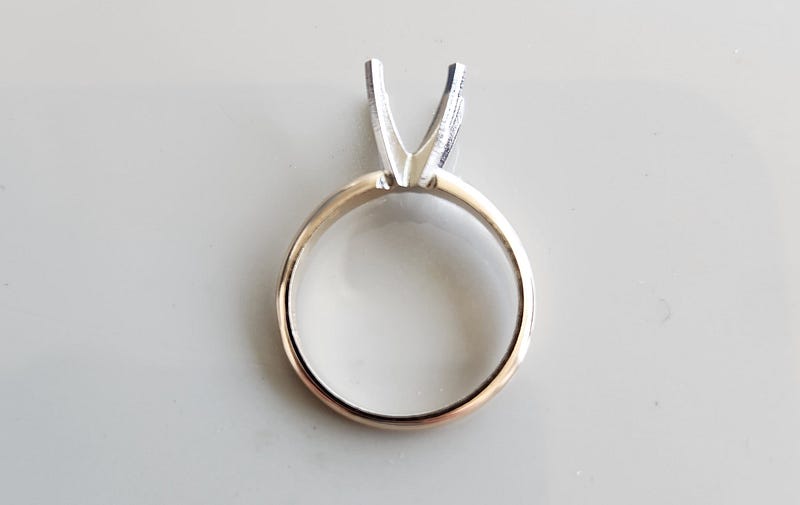
It’s a 4-prong setting and probably the first stone setting any apprentice would master. I, however, am a hobbyist, so I master nothing. I hack my way through everything, and I’ve screwed up many settings, passing them off as my one-of-a-kind artistic signature. My stone faceting teacher in Paris taught me that rationalization. It’s a good one!
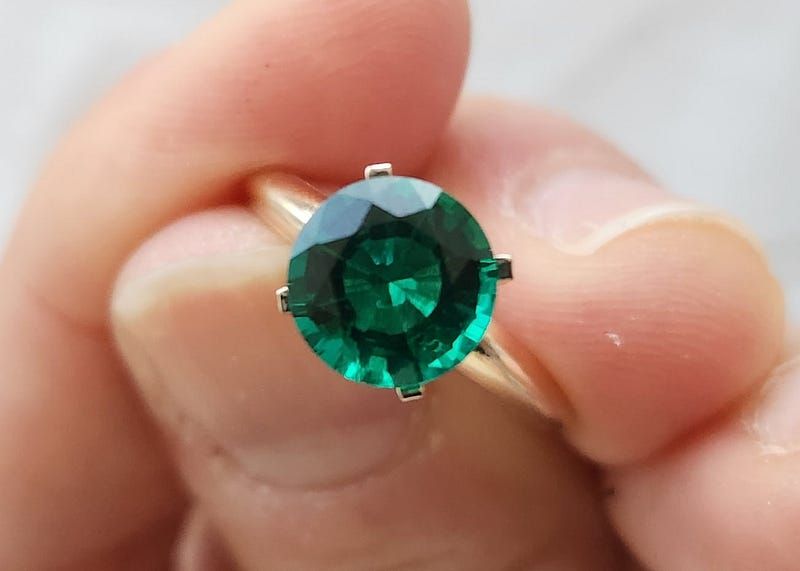
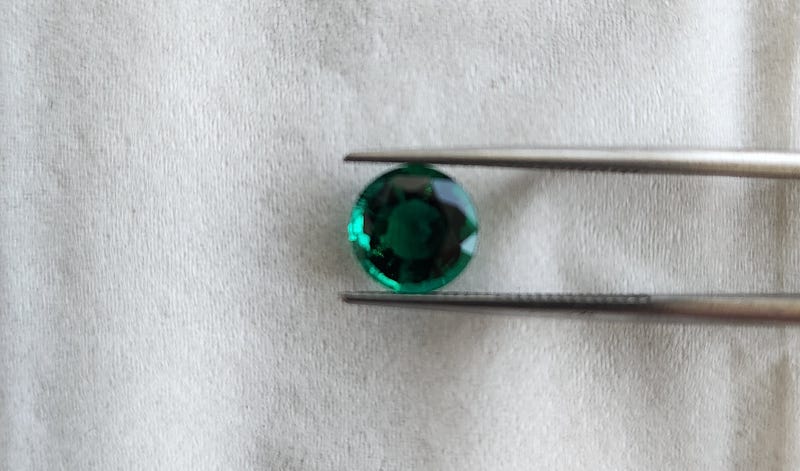
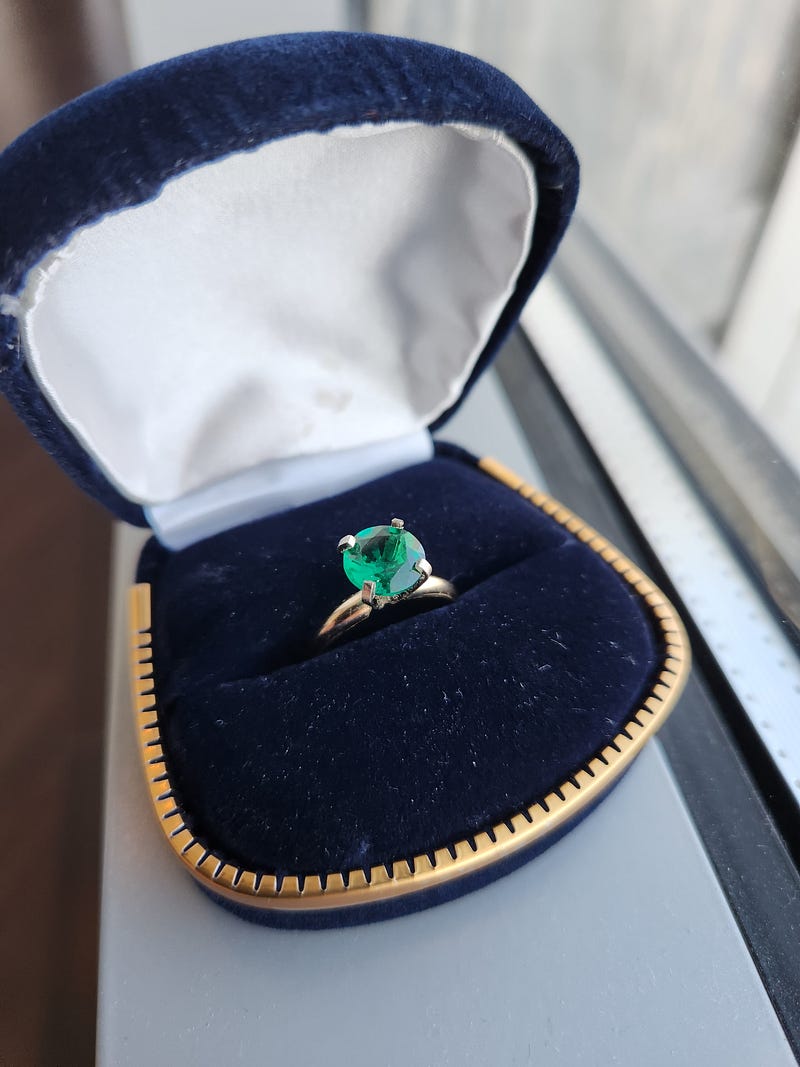
I bought this mounting for a synthetic round emerald I had purchased a while back. It’s not the typical “Crazy Rich Asians” emerald cut, because normally, natural emeralds would be too expensive to shed that much rough (material removed during the cutting process) for a round cut. Round cuts like this one yield less mass than emerald cuts, making it less valuable as an end product. The stone faceter is always trying to balance the beauty of the gem with carat size. But, since this is synthetic emerald (which is real emerald chemically, just produced in a lab and not found in nature), we can play around with shapes a lot more. You don’t typically see a round emerald, and that tickles me.
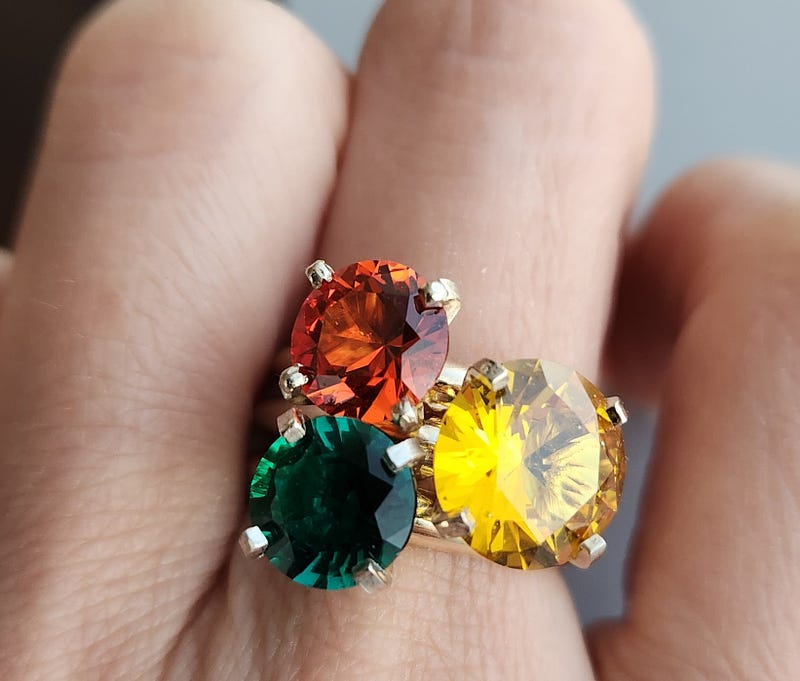
I love the look of round solitaires for their simplicity, because it’s just one round gemstone mounted on a simple ring. It’s a timeless look that will never go out of style. It’s also versatile, so I had an idea to mount a rainbow suite of round, solitaire rings that I can mix-and-match and stack on my finger depending on my mood. I can’t get enough of round solitaires, so the more the merrier!
The process of mounting a loose stone is simple in theory, but in practice, I still have a lot to learn. Before I continue on, I want to make the disclaimer that this is by no means a setting done by a professional. I think a professional would puke at my work to be honest, so please don’t use this post as a how-to for setting a round 4-prong setting.
This particular 8mm emerald isn’t the best cut stone. It has lots of misaligned facets on both the crown (the top of the gem) and the pavilion (the bottom, where the gem comes to a point). The stone has a beautiful color with no inclusions to the naked eye — a clear sign that this is synthetic. Natural emeralds are riddled with inclusions, so much so, that some synthetics try to mimic inclusions! I like clear, transparent stones, so I’m glad I don’t have to pay more for nature’s beauty.
I followed Alan Revere’s Professional Stonesetting, which is an excellent book. Well, it was more that I took his instructions as rough guidelines. In his book, Revere teaches how to set stones step-by-step in meticulous detail, but I struggle with some of those details. Primarily because I have an aversion to them.
Let me explain: The whole process of stone setting requires filing metal, and that means removing metal. I’m not a fan of this for two reasons. 1) It’s literally money turned into gold dust that I can’t recuperate. 2) The less metal on the piece, the weaker it is. Even though this is all part of the normal process of making jewelry, my monkey brain just thinks it makes no sense.
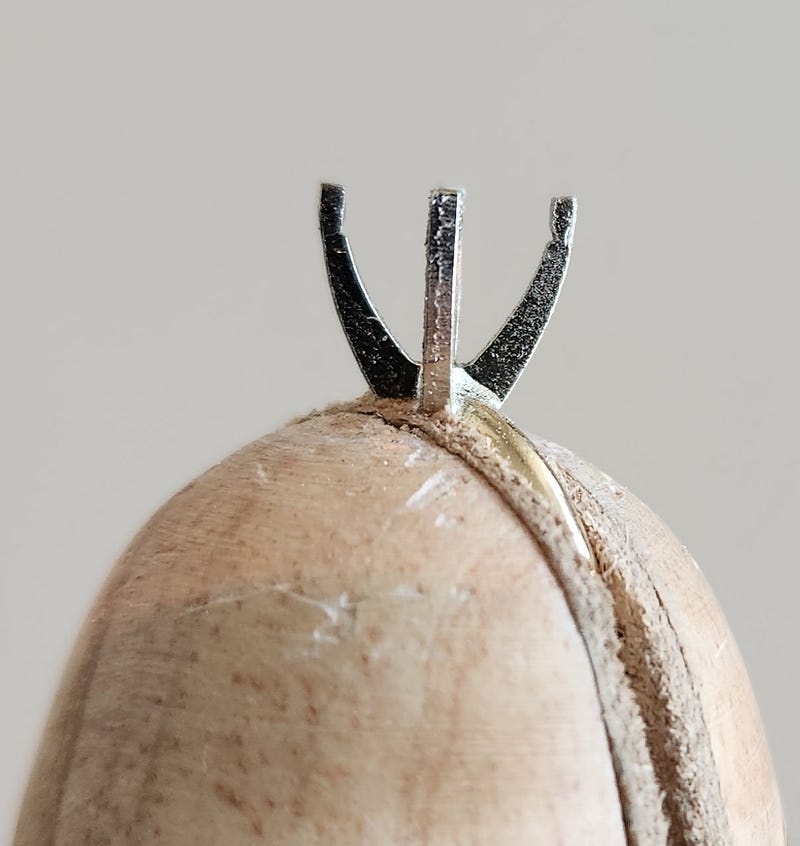
Regardless of my feelings on filing, the first step in this process is to align the prongs with pliers such that the stone sits just atop the prongs like this:
Then you mark the location where the stone’s girdle (the space between the crown and pavilion) will sit. For this part, you want to make sure that the stone will sit level, so calipers are advised to make this precise, but I just eyeballed it (again, I am not a professional).
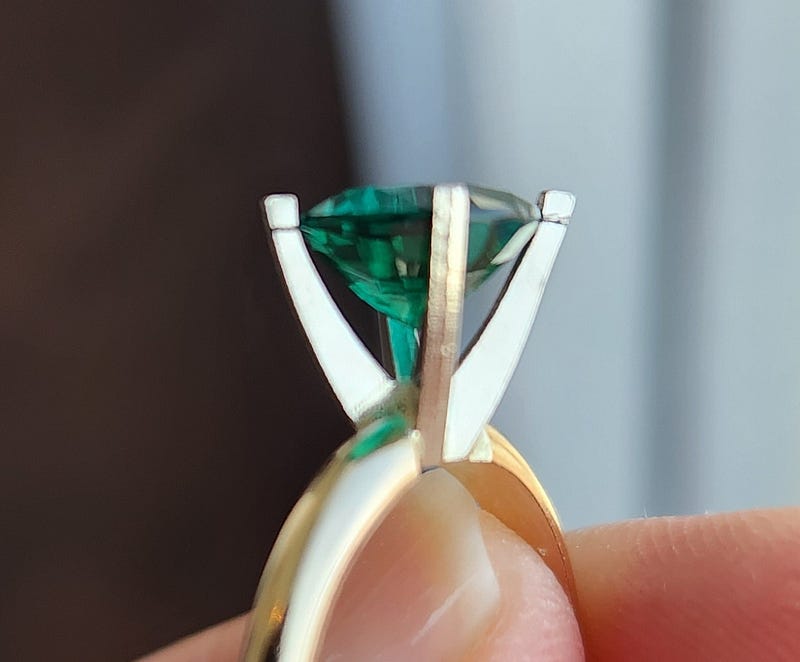
Now, you start filing away. Once you’ve found the point where you want the girdle to sit, carve out a notch with a small square file. Once you have a notch carved out, you start filing excess metal above the notch so that you can ultimately push the stone into the prong setting.
Once the stone is in, you just use pliers to bend the prongs over the stone so that it stays in place, and voila! Well, if you’re doing this professionally, there are more steps you would do, but as I said, I hate filing off more metal than I need to. You can get artistic on the prong’s design, like further filing them into claws or beads, but I default to the tab design that the prongs naturally give (again, it’s my aversion to filing metal). Trust me, no one notices when you wear jewelry what prong design you have on your ring.
Now I have three colors of my rainbow!
If jewelry excites you, I hope my post shows you that even a simpleton can make jewelry, so you can too! Don’t be afraid to try it yourself!